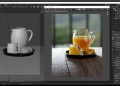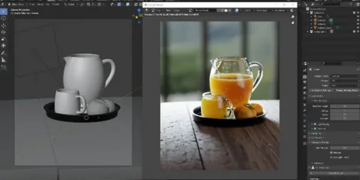


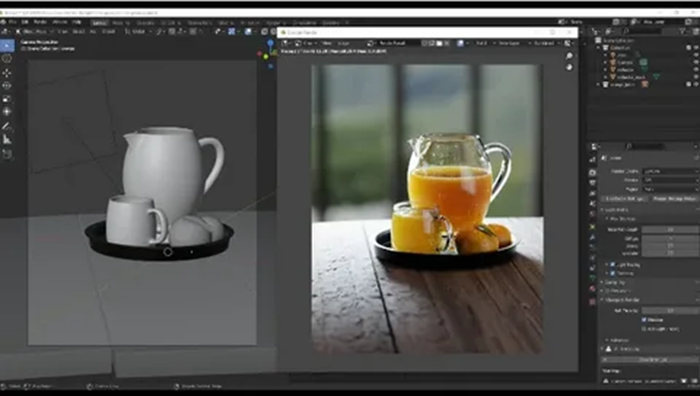
3D rendering is the process of converting a three-dimensional scene into a finished two-dimensional image or video sequence visible on the screen.
During rendering, the engine calculates the shape of objects, materials, lighting, shadows, reflections, and perspective to ensure the virtual model looks as convincing as possible and matches the artist’s vision.
The essence of 3D rendering is that it connects the technical aspects of modeling with the final visualization: it is during the rendering stage that the nuances of composition, shader quality, and lighting settings become apparent. Understanding the principles of image calculation helps not only control realism and style but also consciously choose a work approach and evaluate rendering pricing based on the complexity of the scene and the requirements for the final result.
What happens when converting a 3D scene into a 2D image
In practice, rendering combines two large groups of tasks: geometric (how objects are framed and overlap each other) and lighting (how light interacts with surfaces and the environment). The final image is the result of numerous sequential transformations and calculations that convert 3D data to a 2D projection and then simulate visible light.
Camera, Projection, and Visibility
First, the scene is converted to the camera coordinate system: all object vertices are transformed using translation, rotation, and scale matrices, and then translated into camera space. Next, a projection is applied—most often perspective, which makes distant objects appear smaller, or orthographic, which makes their dimensions independent of distance. At this stage, 3D points are assigned screen coordinates, meaning they become candidates for specific pixels.
Next, visibility is determined: which surfaces are actually visible and which are hidden by others. In a typical “rasterization” pipeline, polygons are projected onto the screen, broken into fragments (pixel candidates), and depth is compared using a z-buffer to select the surface closest to the camera. In the ray tracing approach, a ray is cast for each pixel, searching for the first intersection with geometry—this determines which object is visible at that pixel.
Lighting, Materials, and Deriving the Final Pixel
Once the visible surface is determined for a pixel, the renderer calculates its appearance using the shading model and materials. Surface properties are taken into account: base color (albedo), roughness, metallicity, normals, transparency, as well as textures and procedural maps. The contribution of light sources is then calculated: direct light, shadows, reflections, and refractions, and in more physically based methods, global illumination (global illumination), which is indirect light that bounces between objects multiple times.
In the final step, the resulting raw image undergoes transformations to appear correctly on the screen: summing and averaging samples (for anti-aliasing and noise reduction), tone mapping (converting HDR luminance to the display range), gamma correction, and sometimes post-processing (glare, depth of field, motion blur). As a result, each camera view direction becomes a specific RGB value, and the entire scene is captured as a flat 2D image.
- Geometry: transformations, projection, and detection of visible surfaces.
- Light: calculating the interaction of light with materials and the environment.
- Finalization: anti-aliasing, tone mapping, and preparing the image for display.